How to Checkmate With Bishop and Knight? (Explained)
In previous chapters, we concentrated on the battles of certain pieces versus lesser pieces. This time we focus on the process of mating the solitary king with a bishop and a knight.
Any club player knows how to mate the sole enemy king with king and queen or with king and rook. It is a bit trickier with the king and two bishops but is accomplished according to the same principle: the enemy king is imprisoned by steadily denying all the adjacent squares. In the end, mating is not so difficult anymore.
Is it possible to checkmate with a bishop and knight?
Here are a few rules
- For the defending king, the most stubborn policy is to head for the corner that the enemy bishop cannot control. Therefore, the attacker must force the defender into a corner that he does control.
- The own king must be skilfully employed to force the enemy king to the edge.
- Bishop and knight cooperate best when the knight controls squares of different colors than the bishops. The pieces need to control as many squares as possible, gradually confining the enemy king to a smaller prison.
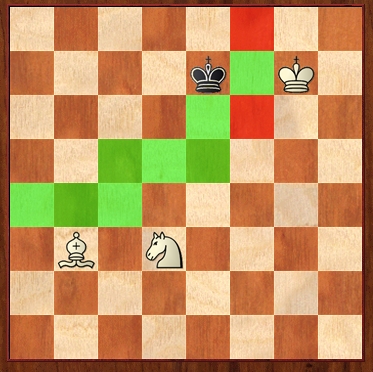
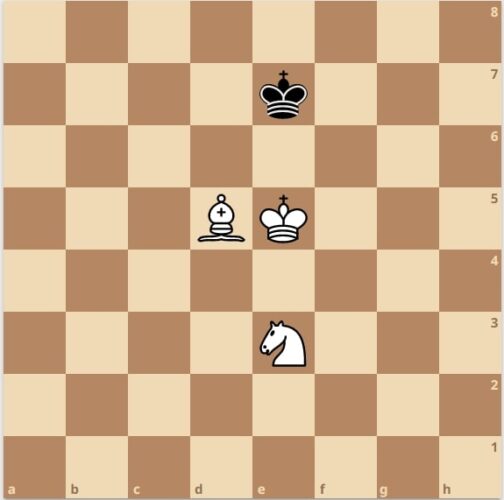
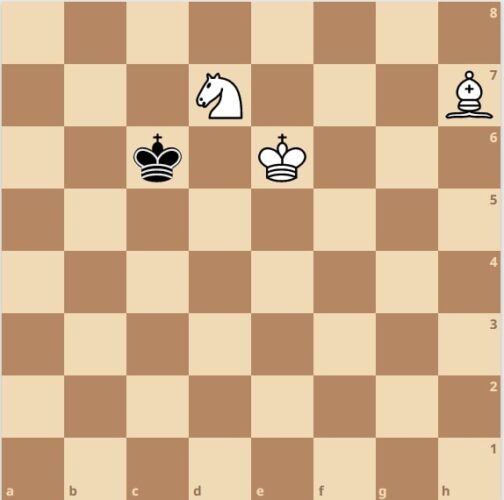
With the advice given above and the following basic positions, it will no longer be challenging to win this endgame. First, we show you the basic position in which the enemy king is imprisoned in a sort of cage, as it were.

Bishop and knight create a barrier, keeping the enemy king confined to six squares in the favorable corner. White doesn’t even need his king to keep the black monarch imprisoned. This position illustrates how the bishop and knight can cooperate. Of course, the king is still needed to finish the mating process.
This barrier will not easily occur in real life, but memorizing the picture in your head won’t do any harm.
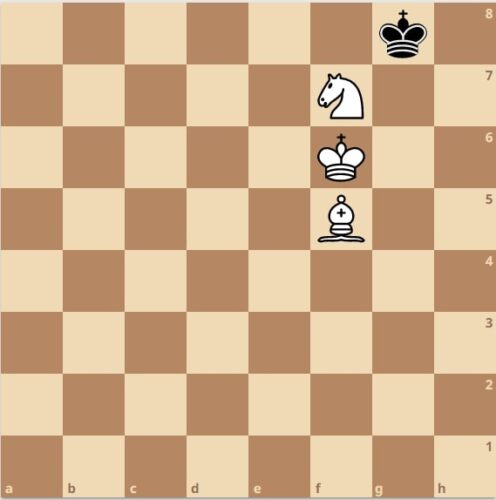
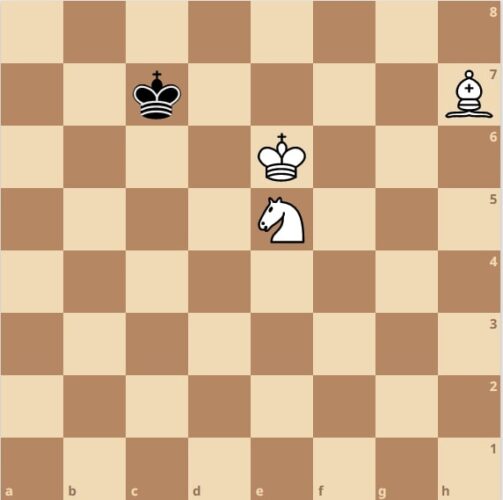
In the next position, we recognize a somewhat larger prison. Bishop and knight control quite a lot of squares in the top left corner.
Notice, however, that there are two enormous holes in the ‘fence’: f6 and f8 are potential holes through which the king might try to escape.
White’s king on g7 keeps tight control of these two squares, securing the cage. White can try to reach the position of the ‘prison’ shown earlier, where Black had only six squares at his disposal.
In practice, this is not that easy. A better plan is to force the king to the edge, using the pieces aided by the king. Here is an example of how to go about this (for my convenience, I have used the tablebases):
1. Bf7 Kd6 2. Kf8 Kd7 3. Bb3 Kd6 4. Ke8 Kc7 5. Ke7 Kc6 6. Ke6 Kc7 7. Ba4 Kb7 8. Kd6 Kb6 9. Bc6 Ka5 10. Kc5 Ka6 11. Ne5 Ka5 12. Nc4+ Ka6 13. Kd6 Ka7 14. Kc7 Ka6 15. Ba4 Ka7 16. Bb5 Ka8 17. Nb6+ Ka7 18. Nc8+ Ka8 19. Bc6# 1-0
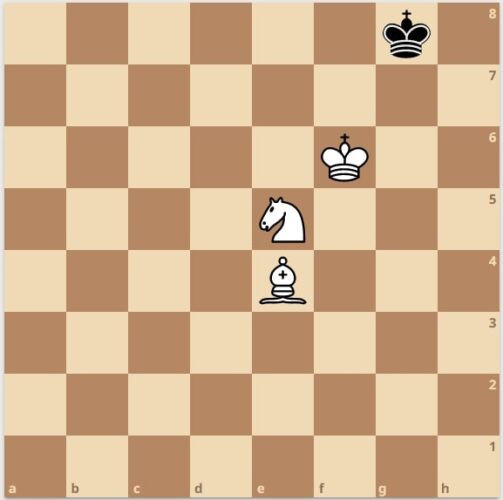
One concrete winning method is to force the enemy king to any corner. With a little dexterity, this will work. Assuming that he doesn’t cooperate by choosing the wrong corner (for him), we will demonstrate how he can be mated in the end in the final diagram.
1. Bc4 Ke7 2. Ke5
It is essential to employ your king actively.
2…Kd7 3. Bd5 Ke7
3…Kc7 is not appetizing for Black because it puts the king in the wrong corner.
4. Be6 Ke8 5. Nf5 Kf8 6. Kf6 Ke8 7. Nd6+
7…Kf8 After 7…Kd8, the king, seems to escape, but with 8. Nb5 White blocks that escape route.
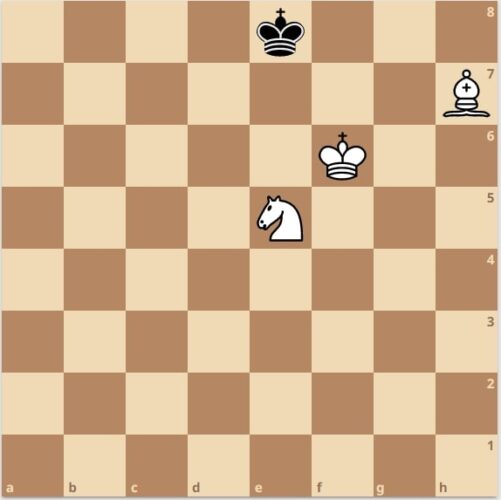
8. Bf5 Kg8 9. Nf7
And we have reached the last diagram. Of course, this can by no means be forced, but it gives us an indication of how the game might develop in practice.
1-0
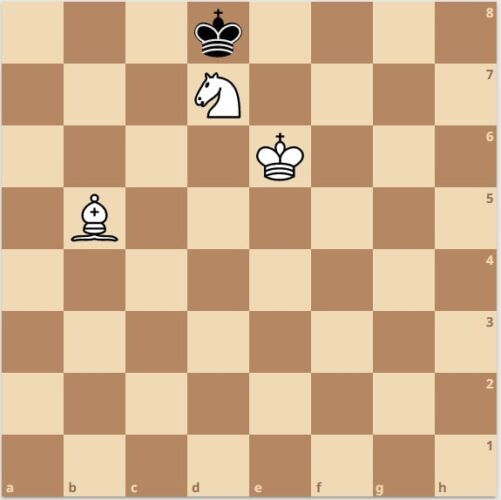
Let’s see the following example.
Many books on endgames give this position. The principle is to force the black king from his safe corner straight to the other corner. The trick is not to let him escape from his doomed corner.
There are three principles to be observed:
- First: the knight will mainly govern the dark squares
- Second: your king plays an essential part in denying squares to the opponent
- Third: White makes use of tempo play (zugzwang)
1. Nf7 Kf8 2. Bh7
The second step in the hunt. The bishop stops the black king in his tracks so that he can no longer reach his safe corner.
2…Ke8
The following mnemonic comes in handy. This method was explained in endgame books by the former world champion Max Euwe. Remember to visualize the letter ‘M’. The knight is about to follow its contours.

3. Ne5
The first stage of the contours of the letter ‘M’.
3…Kd8
The most stubborn defence.
The method is simple and straightforward: 3…Kf8 4. Nd7+ Ke8 5. Ke6 Kd8 6. Kd6!
White must use his king as much as possible. 6…Ke8 7. Bg6+. Preventing the black king’s escape. Notice how beautifully the three pieces cooperate. 7…Kd8 8. Nc5 (see analysis diagram)
Continuing with that letter ‘M’! 8…Kc8. A waiting move. 9. Bf7 Kd8 (after 9…Kb8 10. Be6 Ka7 11. Kc7 Black will very soon be restricted to only two squares. Mate isn’t very far away then: 11…Ka8 12. Kb6 Kb8 13. Na6+ Ka8 14. Bd5#) 10. Nb7+. Now that we know how it works, it’s a piece of cake. 10…Kc8 11. Kc6 Kb8 12. Kb6 Kc8 13. Be6+ Kb8 14. Nc5 Ka8 15. Bd7 Kb8 16. Na6+ Ka8 17. Bc6#
4. Ke6 Kc7
At first sight, there is a wide-open space for Black. But here, a minor miracle happens.
5. Nd7!
Remember, we were in the process of constructing the letter ‘M’! With this mysterious knight move, White controls some vital squares.
5…Kc6
6. Bd3!
An essential move. The bishop and knight control squares b5, b6, and c5. The black king is confined to the top left corner.
6…Kc7
Again Black tries to escape to the other dark square corner.
7. Bb5!
White incessantly keeps reducing Black’s options.
7…Kd8
8. Nb6!
The first time we abandon the ‘M’ idea by Max Euwe. It is now possible to create the barrier that we have seen in our first example.
8…Kc7 9. Nd5+
Black can feel the noose dangling down.
9…Kb7 10. Kd7
White’s king is used to restrict Black further still.
10…Kb8 11. Ba6 Ka7 12. Bc8 Kb8
13. Kd8
A waiting move to finish it all.
13…Ka7 14. Kc7 Ka8 15. Nb4 Ka7 16. Nc6+ Ka8 17. Bb7# 1-0
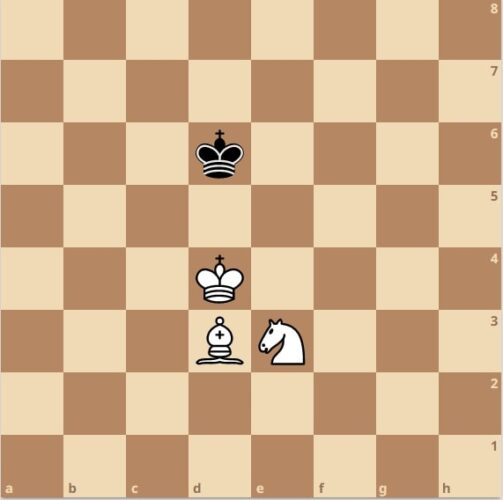
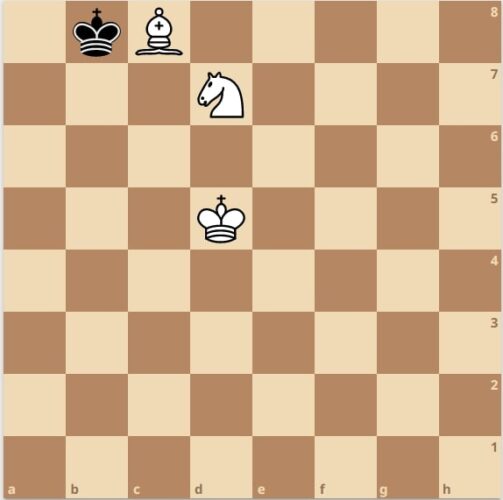
The endgame bishop and knight versus solitary king is not always a certain win, as our following diagram demonstrates. That’s our exercise this time.
EXERCISE
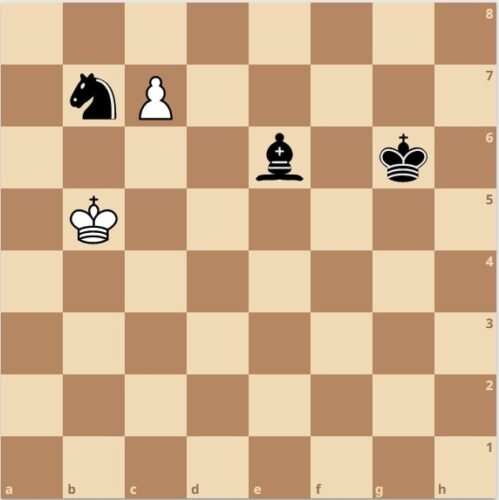
In this endgame study by Agapov & Risskikh from 2003, the only move that leads to a draw is:
7. c8=N!
A minor promotion to a knight, because White would lose if he promoted the pawn to a different piece. For example, 7. c8=Q? Nd6+ 8. Kc6 Nxc8 and Black wins.
7…Bxc8 8. Kb6
The black pieces are awkwardly placed, yielding White half a point.
8…Nd6 9. Kc7
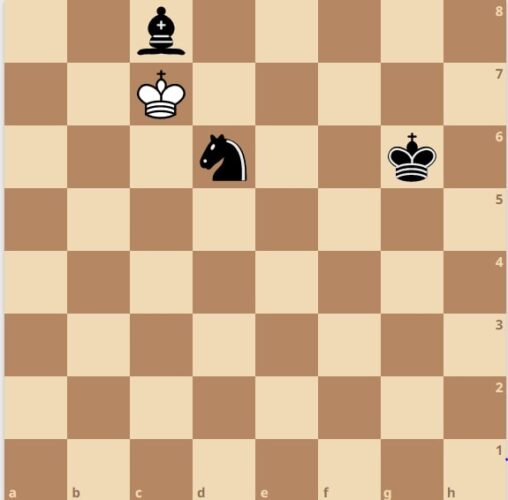
And one of the pieces will be lost.
½ – ½