What are the Basic Principles of Chess Openings?
Today’s post will be an in-depth look at chess opening principles. Someone can’t start memorizing variations and positions of a particular opening right after learning how to play chess. However, many players begin learning chess with the plan to learn an opening in particular. Before moving on to specific opening lessons, I would highly recommend learning the basic and advanced concepts in the opening of chess.
Once you understand the opening fundamentals and what you are trying to achieve, the memorization of openings will no longer seem like memorization. You will study an opening, and the moves will make logical sense to you, and it will be easy to follow the pattern once the foundation is in place. And it is essential to understand not only what to do but how and why. I believe all opening principles fall under two main categories: Central Control and King Safety.
Central Control
Let’s start with central control: why do you want it? Simply put, any piece on a central square will become more powerful. The closer a piece is to the center, the more powerful it is. But what is this “power” the piece gains by being on a central square? Let’s compare the following diagrams of a knight.
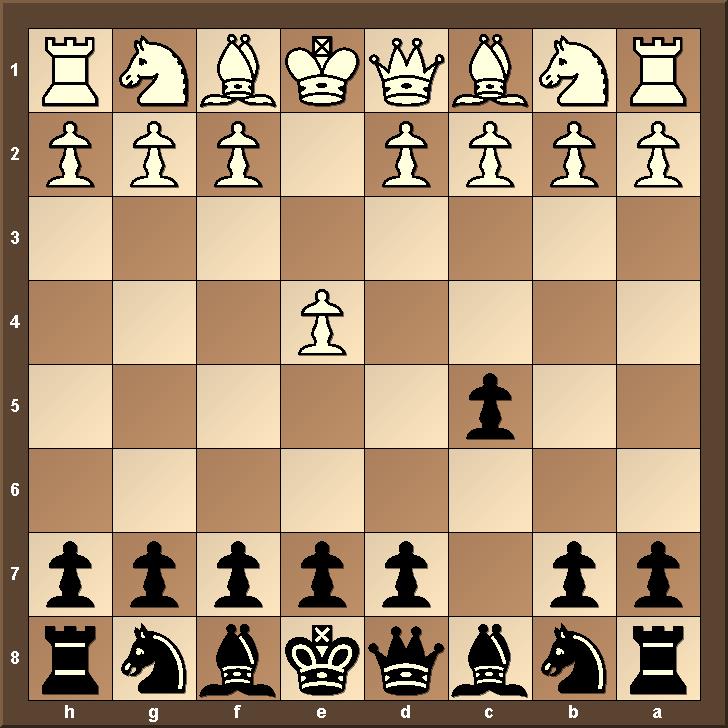
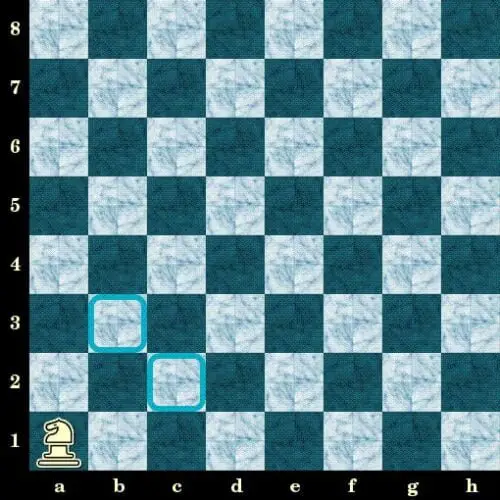
The first image is a knight in the corner:
And the next image is a knight in the center:
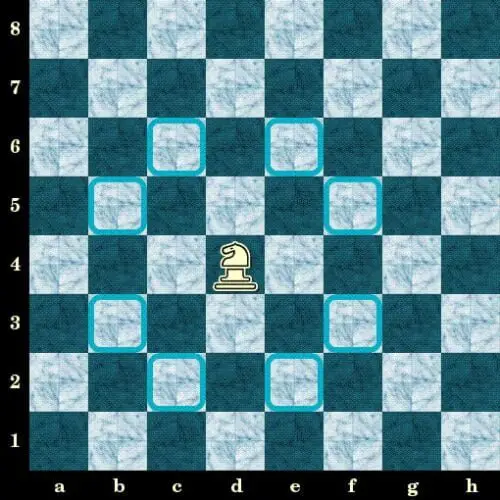
The corner knight only has 2 squares he can jump to b3 and c2. From these squares, the knight can only aid in defending on the king side. The central knight has 8 squares he can jump to (4X as many!): c2, b3, b5, c6, e6, f5, f3, e2.
Not only can the central knight jump to the same squares as central knight c2 and b3 and defend the king side, but he can also hop on b5 and c6 to help an attack on the king side, e6 or f5, or help with an attack on the queen side, and f3 and e2 to help defend the queen side.
The corner knight will need at least 3 moves to be influential on the other side of the board, and you rarely have that kind of time to invest in one piece. The central squares of the board give pieces the ability to move about the board quickly, which is crucial to gaining an advantage in an attack or defense.
The knight is not only threatening to jump on that square to aid in attack or defense, but he’s also stopping your opponent from putting his pieces on those squares. This can cause you, the opponent, to waste time retreating a valuable piece from the knight’s attack range or hinder it from improving by occupying the threatened square.
Is there any other reason to want central control? Absolutely. You may have never considered this, but your forces are separated and uncoordinated at the start of the game. All your pieces start on their worst possible squares, and your pawns block your pieces from being freed and influential on the game.
To improve the pieces, we develop them towards the center. We’re bringing our pieces closer together to combine forces so that we control the squares that make our pieces most powerful. But, the center is also the highway between the king side and queen side.
You queen side knight will have to travel from the queen side corner through the center of the board to help with an attack on your opponent’s king side.
This means that if you control the center, you are hindering your opponent from mounting a successful attack by trapping his queen side pieces on the queen side and king side pieces on the king side.
All you would have to do to defend is trade all your king side pieces for your opponent’s king side pieces, and he no longer has an attack, or the ability to call in the cavalry to finish off an attack. Central control and accurate play will neutralize any attack, so fight for the center!
King Safety
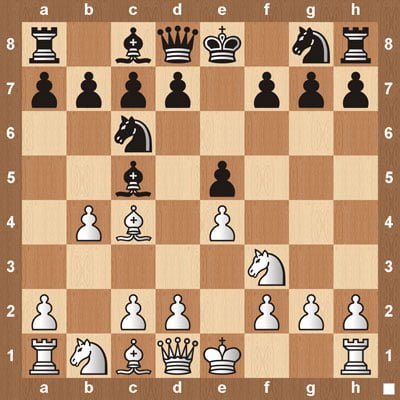
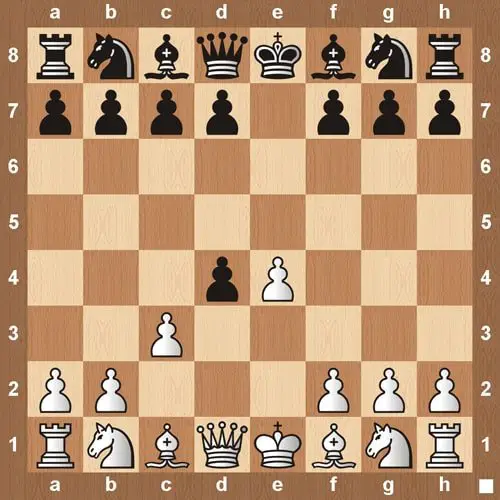
The other main aspect of openings is king safety. King safety is important because you don’t want to be checkmated, but there is also a strategical factor to king safety (or should I say lack thereof?). These are chess tactics known as a pin that happens because of lack of king safety. Take a look at the image below.
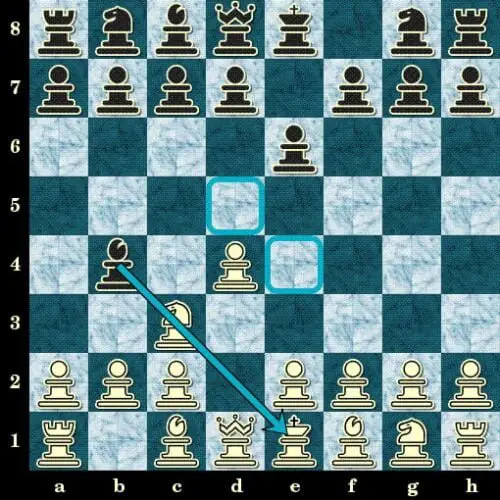
The white knight on c3 is now paralyzed from the pin. The knight on c3 was previously helping control 2 critical central squares e4 and d5.. But now, your opponent is free to move his pieces onto e4 and d5 as long as the knight is pinned.
This happens as a result of a lack of king safety. If the king were safely tucked away in the castled position, this pin could not exist. While the pin exists, you are playing a piece down and failing to do rule #1: control the center. Get your king to safety quickly, and your opponent will not have these tactics at his disposal.